Configuring the Plug-in
Configure the plug-in when you add it to your pipeline.
When you've added the Polaris Software Integrity Platform (Polaris) plug-in you can configure the plug-in.
-
Type a name in the Display name field.
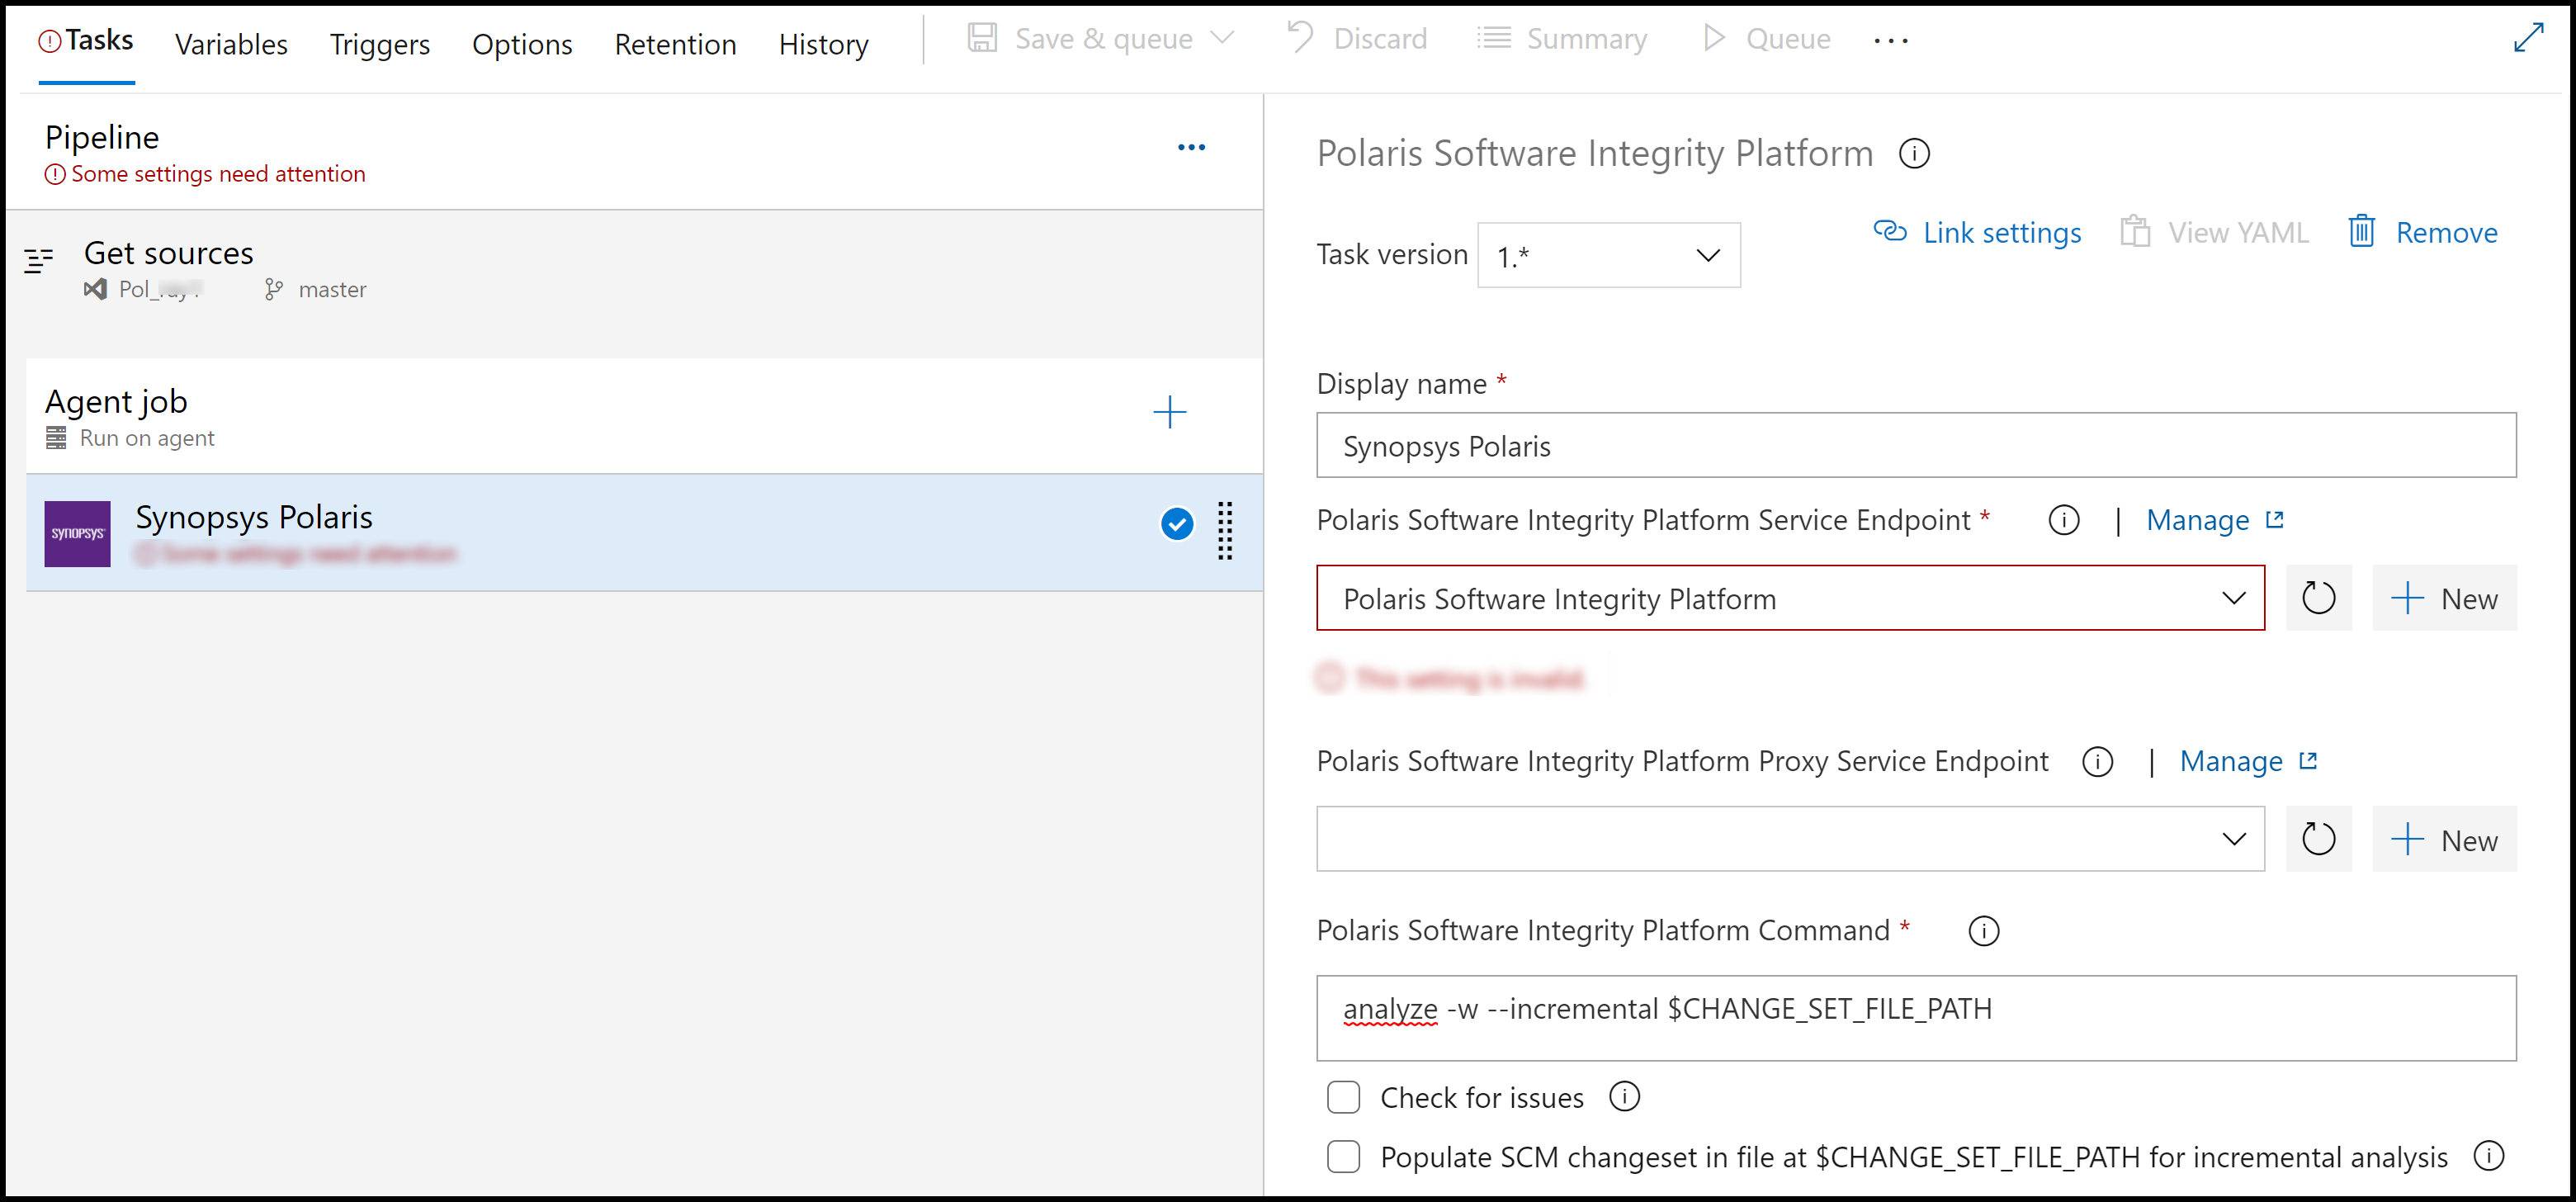
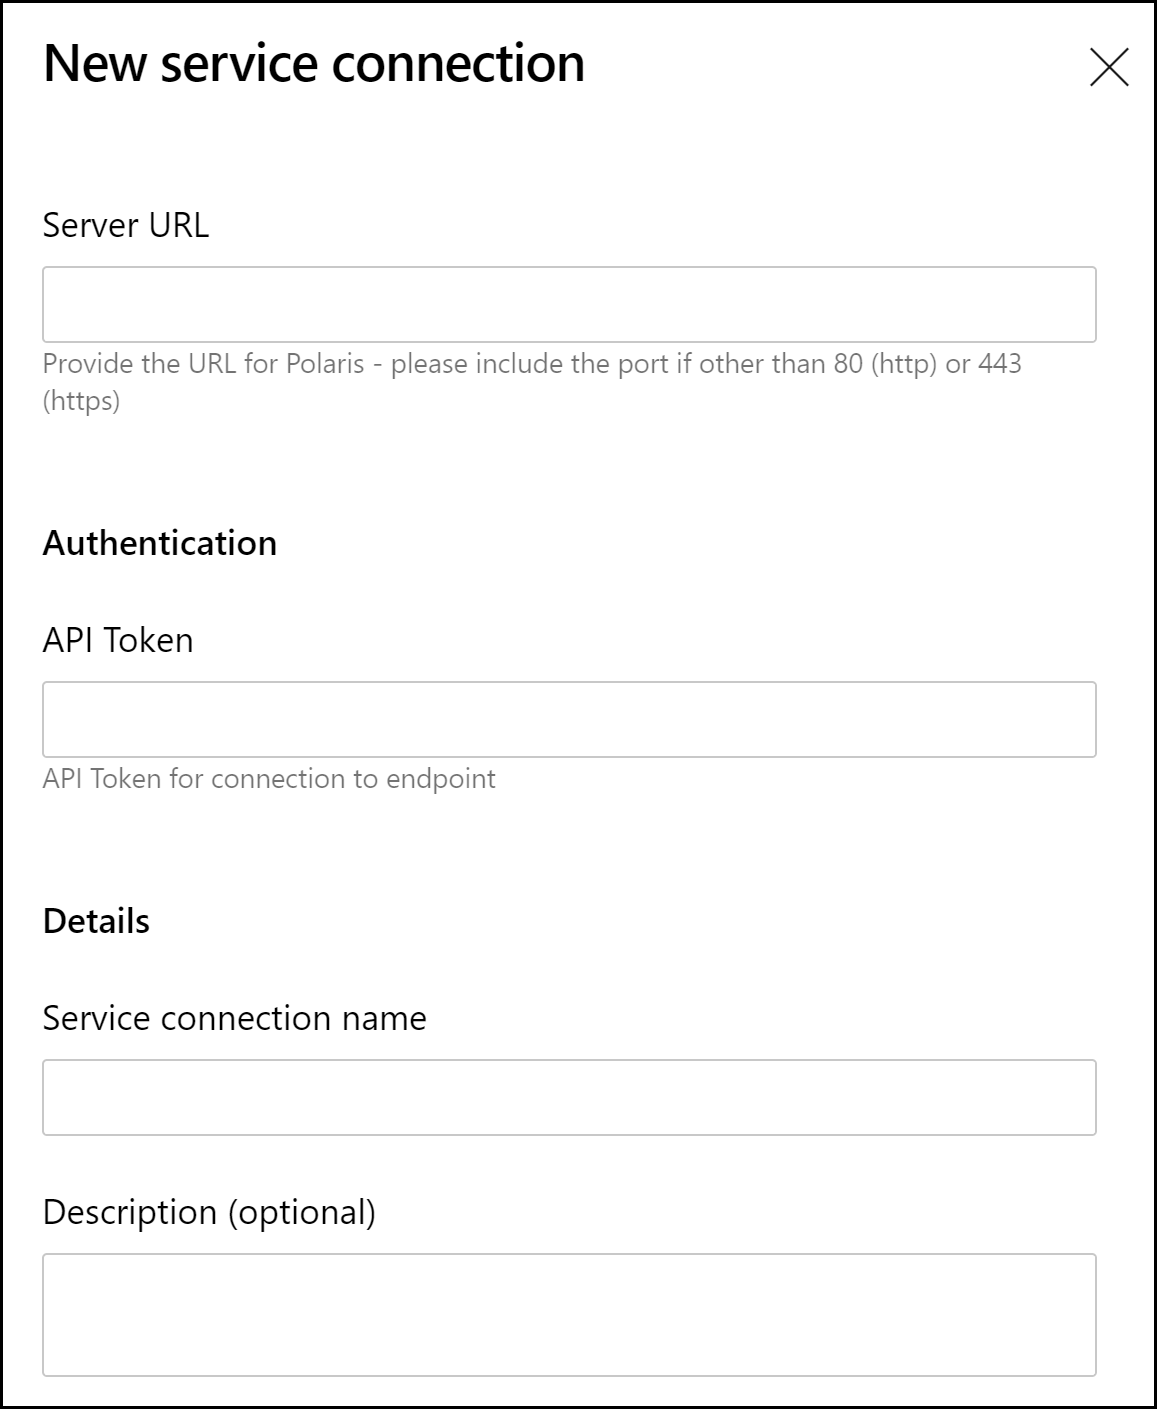
- Click + New to add a new Polaris Software Integrity Platform Service Endpoint.
- Complete the Polaris server details.
-
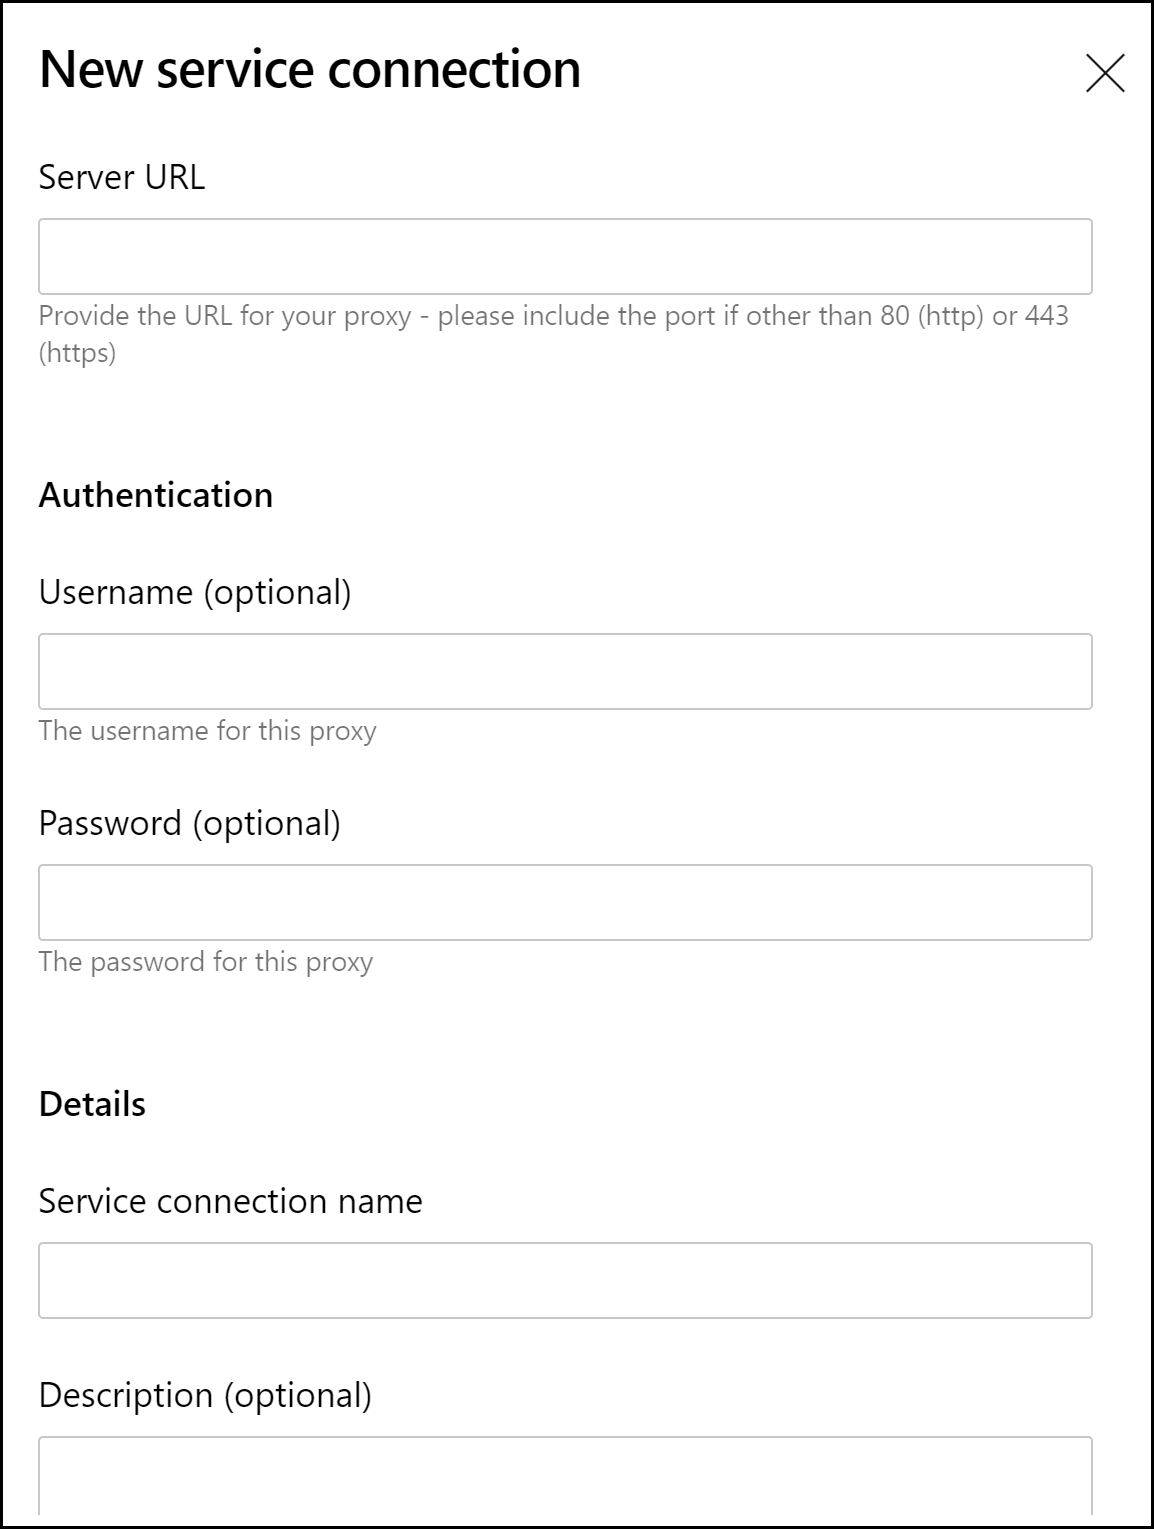
To add a Polaris Software Integrity Platform Proxy Service Endpoint, click +
New.
- Type a name for the proxy connection in the Service connection name field.
- Type the proxy Server URL.
- Optional: Enter the username and password used to access the proxy.
- Type a name for the proxy connection in the Service connection name field.
- Optional: Add a description.
- To enable other pipelines to use this service connection, leave the Grant access permission to all pipelines checkbox selected.
-
Use the Polaris Software Integrity Platform Command
field to enter the
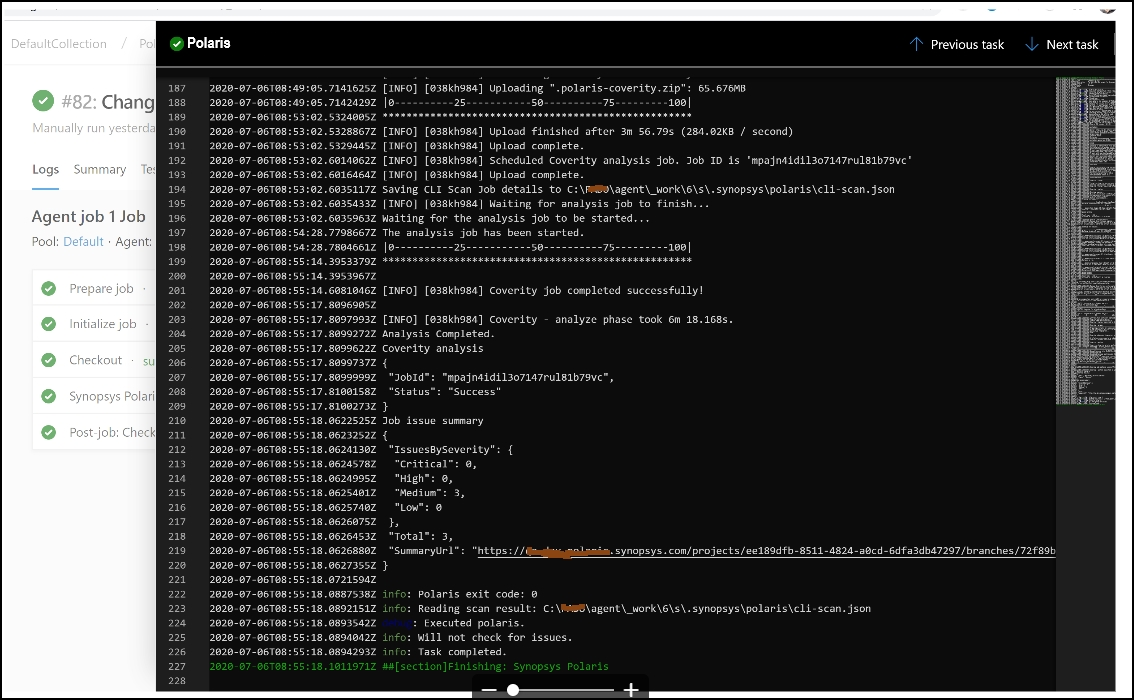
analyze -wcommand. Leave the Check for issues checkbox selected so that the issue count is returned and the build is passed or failed. You can also add other Coverity commands.Note: Using the-wflag ensures that the Polaris CLI will wait and use the JSON file generated by Polaris to check for issues. If you don't use the-woption and you leave Check for issues checkbox selected, the plug-in polls and waits for the job to finish so that there is an issue count to determine whether the build passes or fails.Example of a job where Check for issues checkbox is not selected and build passes with issues.
-
To enable Incremental analysis (LCA), do the following:
-
Select the Succeed or
Fail option from the drop-down menu for the
outcome: When static analysis is skipped because the
changeset contained no files to analyze

-
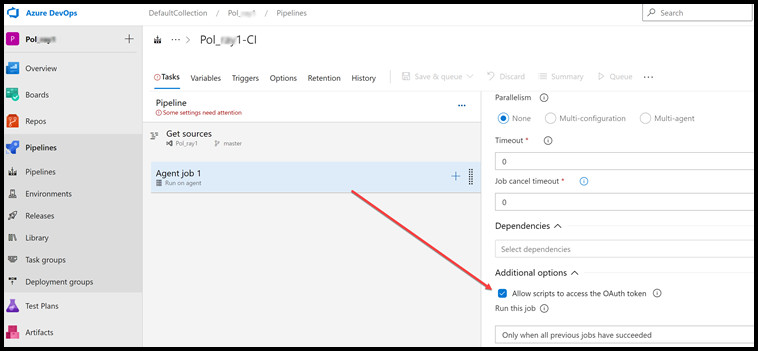
For the plug-in to access builds information, you must enable the
Allow scripts to access the OAuth token checkbox when you
select the Agent Job.
By default, the Polaris Software Integrity Platform CLI installs local analysis tools, which are over 3 GB.
Synopsys Recommendations- Install the analysis tools before running the Polaris CLI and specify the tools location in your polaris.yml file.
- When you install the analysis tools, ensure that you are
installing them in the same
POLARIS_HOMEthat the agent uses.
Note: If the CLI does attempt to install the analysis tools, it might take a long time and you will need to increase the default pipeline timeout.
-
Select the Succeed or
Fail option from the drop-down menu for the
outcome: When static analysis is skipped because the
changeset contained no files to analyze